Drawings of Disney Princesses Step by Step
Up to now, princesses have been the most influential role model to girls of all ages. They are kind, graceful, and beautiful, and they are pretty much any girl would want to be one day.
Since then, finding a prince charming has been the ultimate dream for many girls.. The fascination about royalty has created a huge demand for a tutorial on how to draw a princess.
Finally, we have curated a step-by-step tutorial on how to draw a princess summarized in 9 easy and simple steps.
You can apply these steps whether you want to draw a realistic-looking princess or an animated one.
Each step is accompanied with comprehensible illustrations that serve as your visual guide as you follow the instructions.
Whether you are a novice or an expert in drawing, we're sure you can follow these steps effortlessly. What's more, you can add your own style and improvise in every step.
Feel free to mix and match colors to customize your artwork and make it unique. Let your imagination wander and unleash your creativity. Have fun and use your artistic skills!
What's in this Blog Post
- How to Draw a Princess — Let's get started!
- Step 1
- Step 2 — Draw an Outline of the Princess' Face and Upper Body
- Step 3 — Draw the Outer Layer of the Princess' Gown
- Step 4 — Complete the Bottom Part of the Princess' Gown
- Step 5 — Draw the Puff Sleeves on Both Sides
- Step 6 — Draw Both Arms and Hands of the Princess
- Step 7 — Draw the Princess' Ears, Hair, and Crown
- Step 8 — Add Artistic Patterns and Designs
- Step 9 — Draw the Facial Features of the Princess
- Your Princess Drawing is Complete!
How to Draw a Princess — Let's get started!
Step 1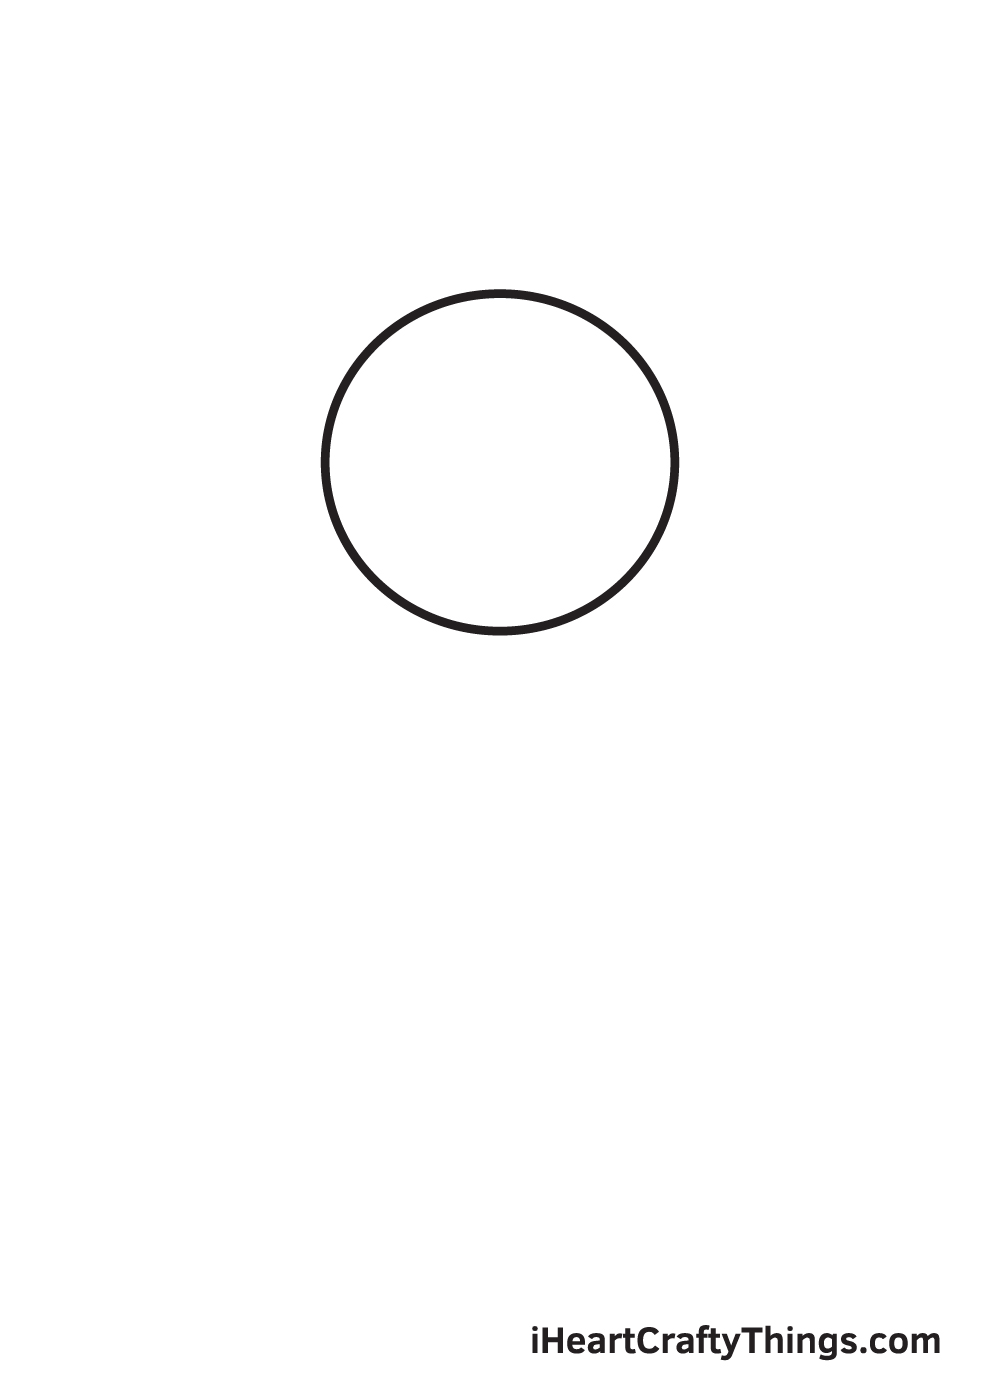
Draw a perfect circle in the upper middle portion of your paper. This outlines the face shape of the princess.
If you can't freehand a perfect circle, feel free to use a compass. It is a drawing tool that enables you to draw a perfect circle swiftly and effortlessly.
To ensure that the outline will be positioned in the middle correctly, draw a horizontal and a vertical line across the paper to create reference lines. The vertical line above the horizontal line in the middle is where you should draw the outline of the face.
Step 2 — Draw an Outline of the Princess' Face and Upper Body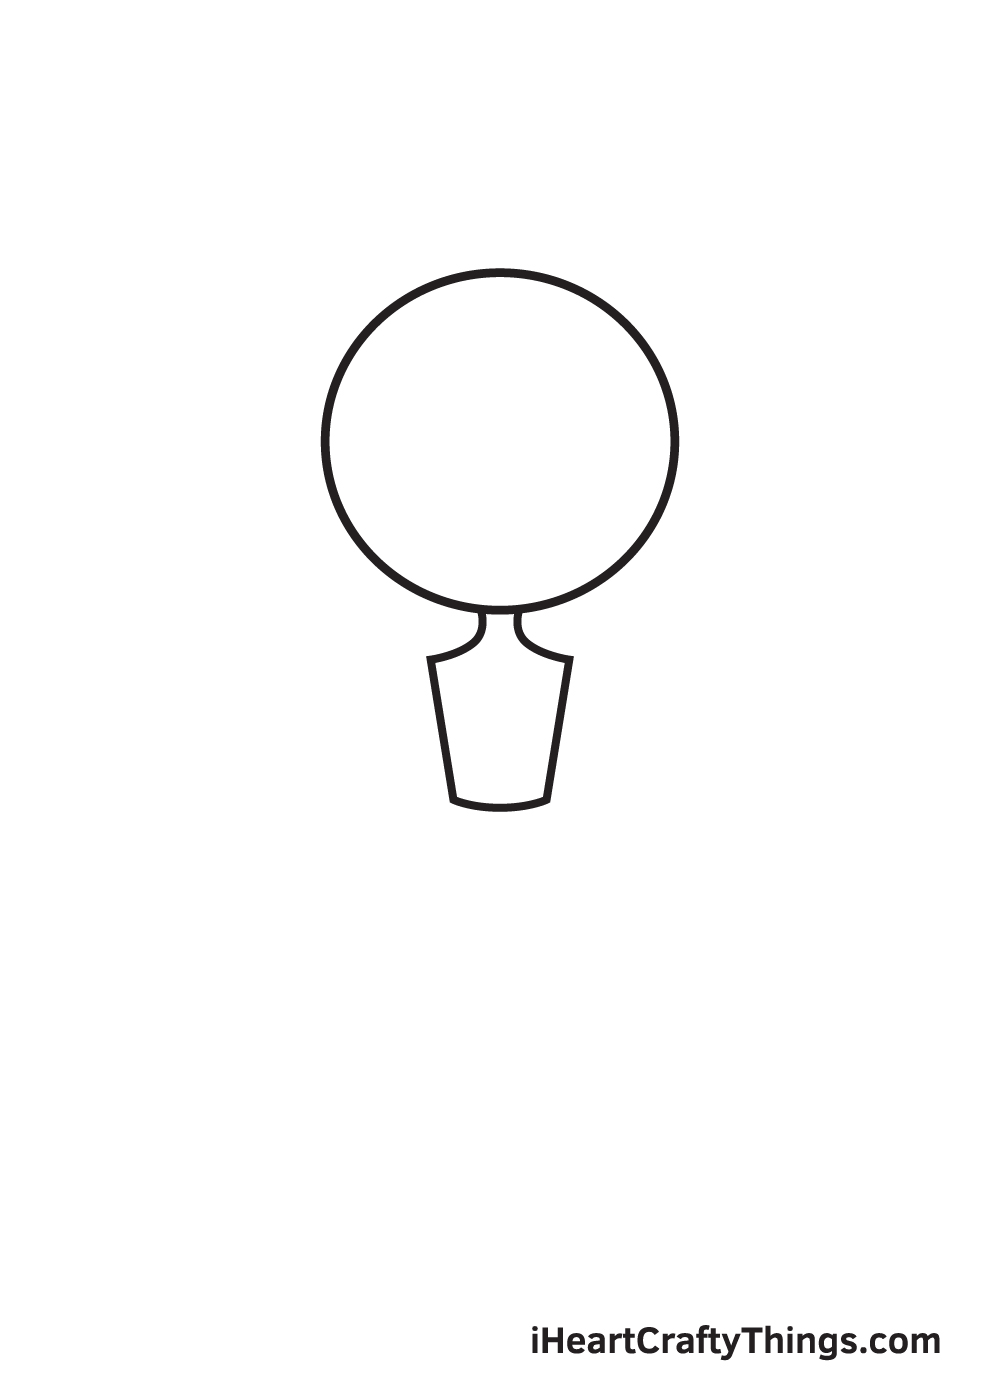
Right underneath the face, draw two curved lines to structure a neck. Then, draw two downward diagonal lines from the shoulder all the way down to the stomach. This figure outlines the upper body or the torso of the princess.
Step 3 — Draw the Outer Layer of the Princess' Gown
Draw two circular flaps on each side below the torso. This outlines the outer fold of the dress the princess is wearing.
Step 4 — Complete the Bottom Part of the Princess' Gown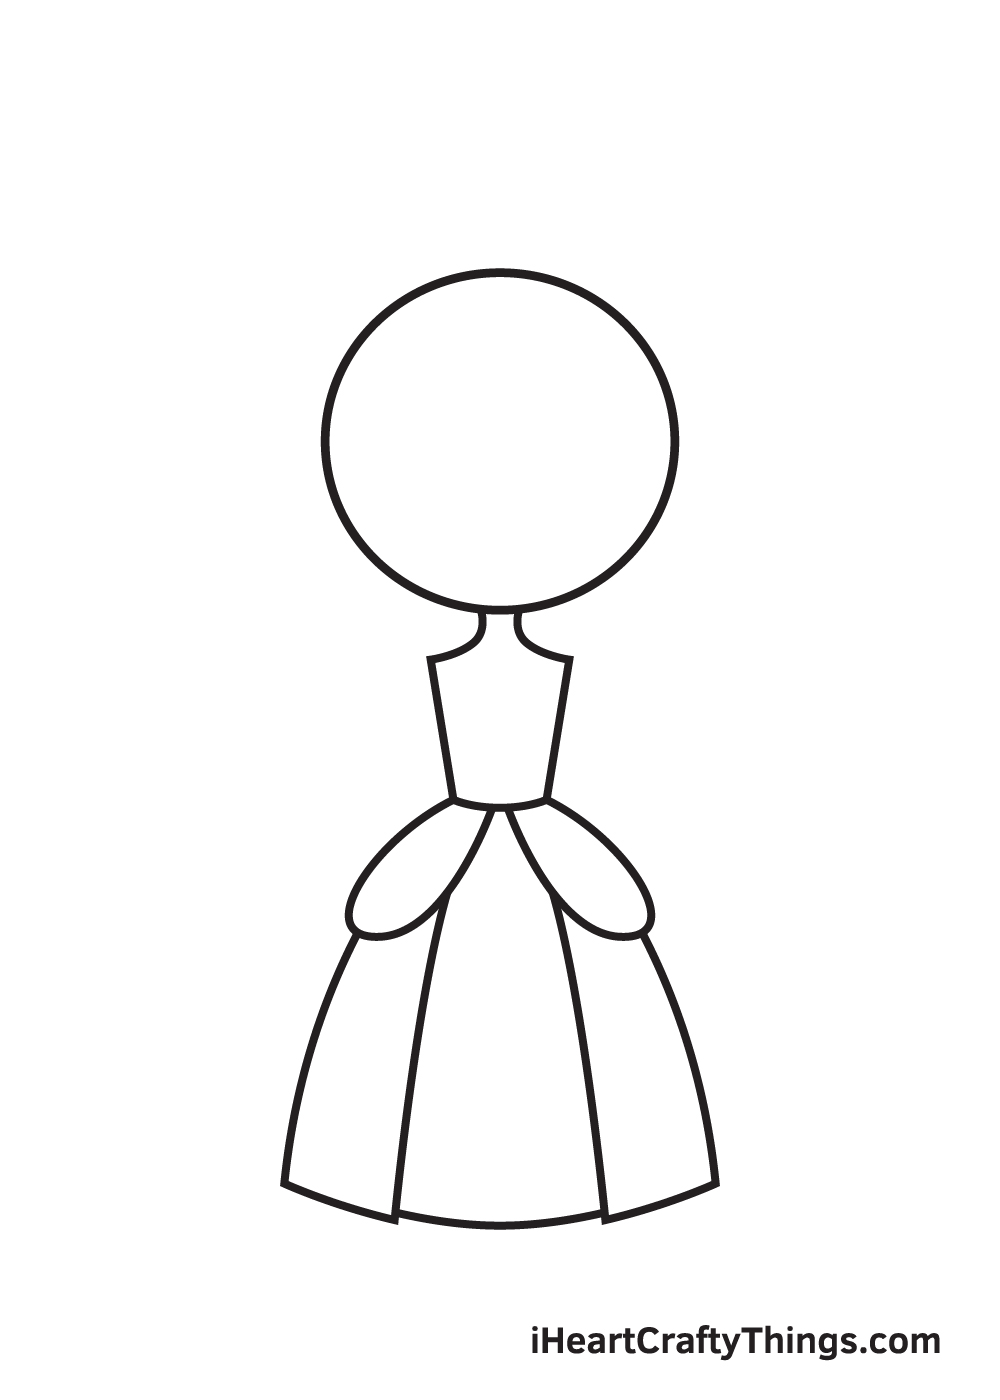
Below the flaps we have drawn in the previous step, draw a long skirt extending all the way down to the princess' feet.
Then, separate the outer layer of the dress from the inner layer by drawing two lines in the middle of the skirt.
Step 5 — Draw the Puff Sleeves on Both Sides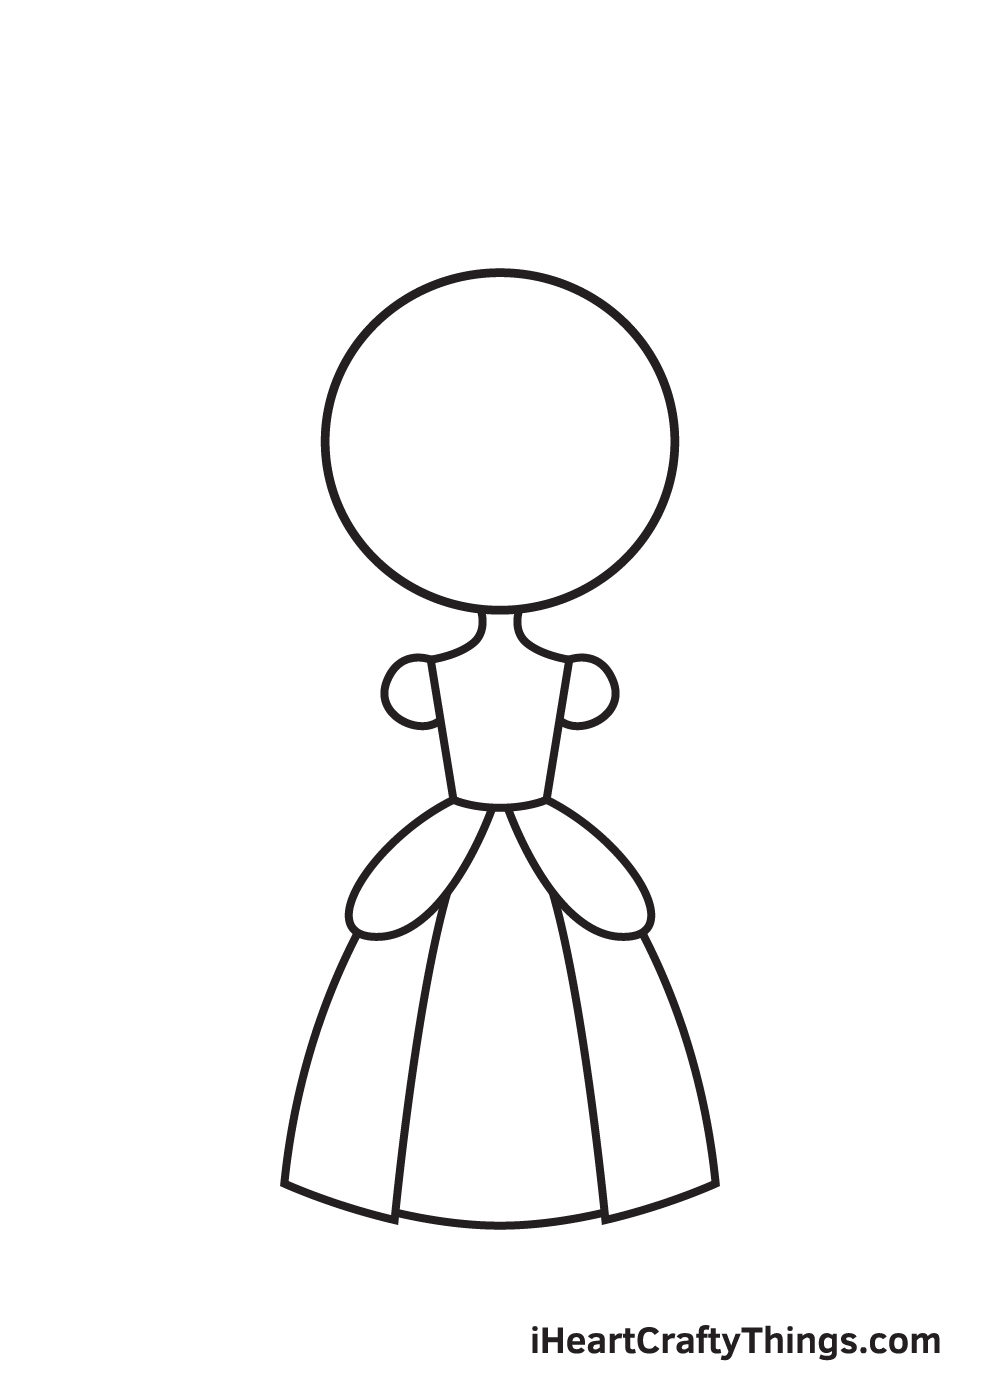
Draw a puff sleeve on each side of the torso. Simply draw a halfway circle on both sides.
Should you plan to add your own style to the dress, below are some instructions on how to incorporate your ideas onto your drawing.
If you want long sleeves for the dress, draw a long, rectangular shape instead of a circle on both sides of the torso. On the other hand, if you want the dress to be sleeveless, skip this step and proceed to the next one.
Step 6 — Draw Both Arms and Hands of the Princess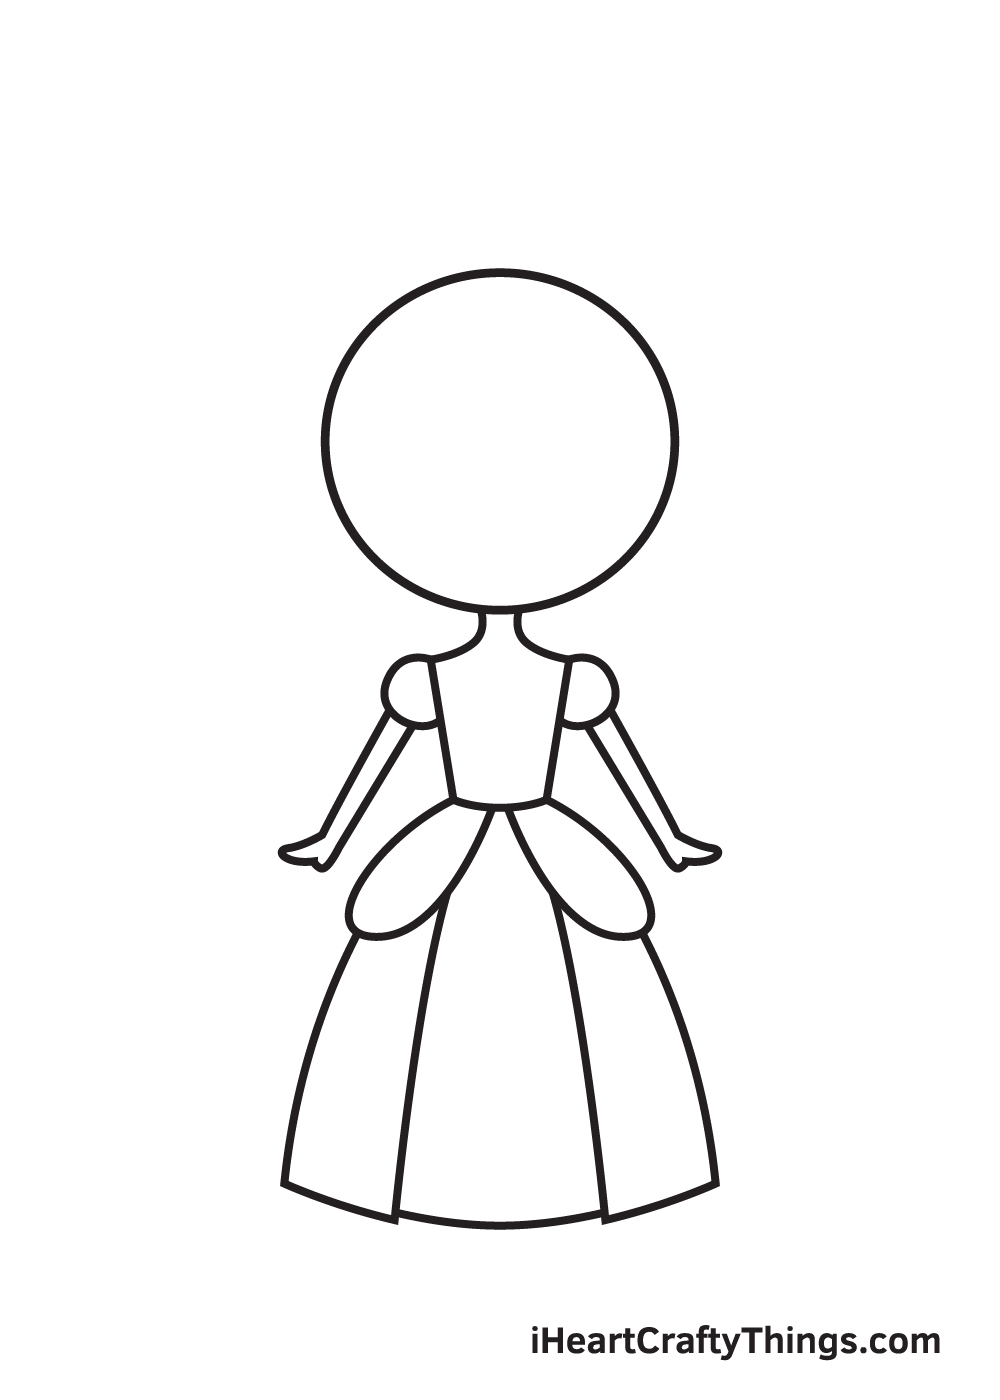
Draw an arm underneath each sleeve. As you can see in the illustration, the hands of the princess are positioned perfectly still on both of her sides.
You can position the arms in any way you want. You can even draw the arms raised as if the princess is waving hello!
Step 7 — Draw the Princess' Ears, Hair, and Crown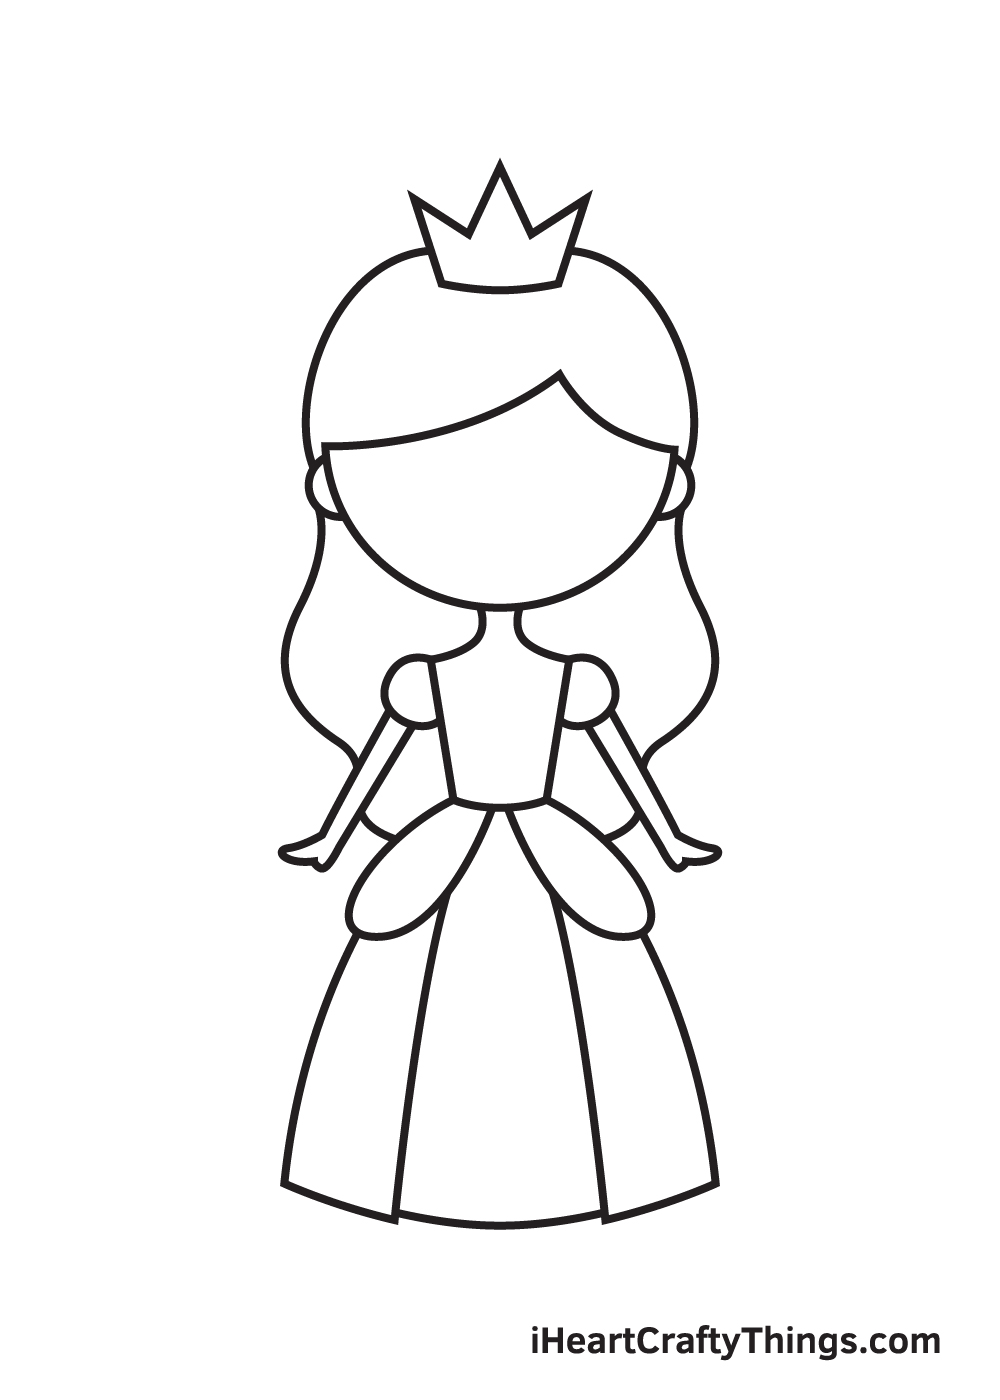
Going back to the head of the princess, draw a halfway sphere on each side of her face. Then, draw a hairline just above her forehead and draw the outline of the hair.
Needless to say, you can draw any hairstyle you like: straight, wavy, or curly. If you're feeling more creative, you can also put her hair on a ponytail or a bun.
Once you've finished drawing the hair, draw a crown right at the top of the head of the princess. You can also make customizations and create your very own dream crown!
Step 8 — Add Artistic Patterns and Designs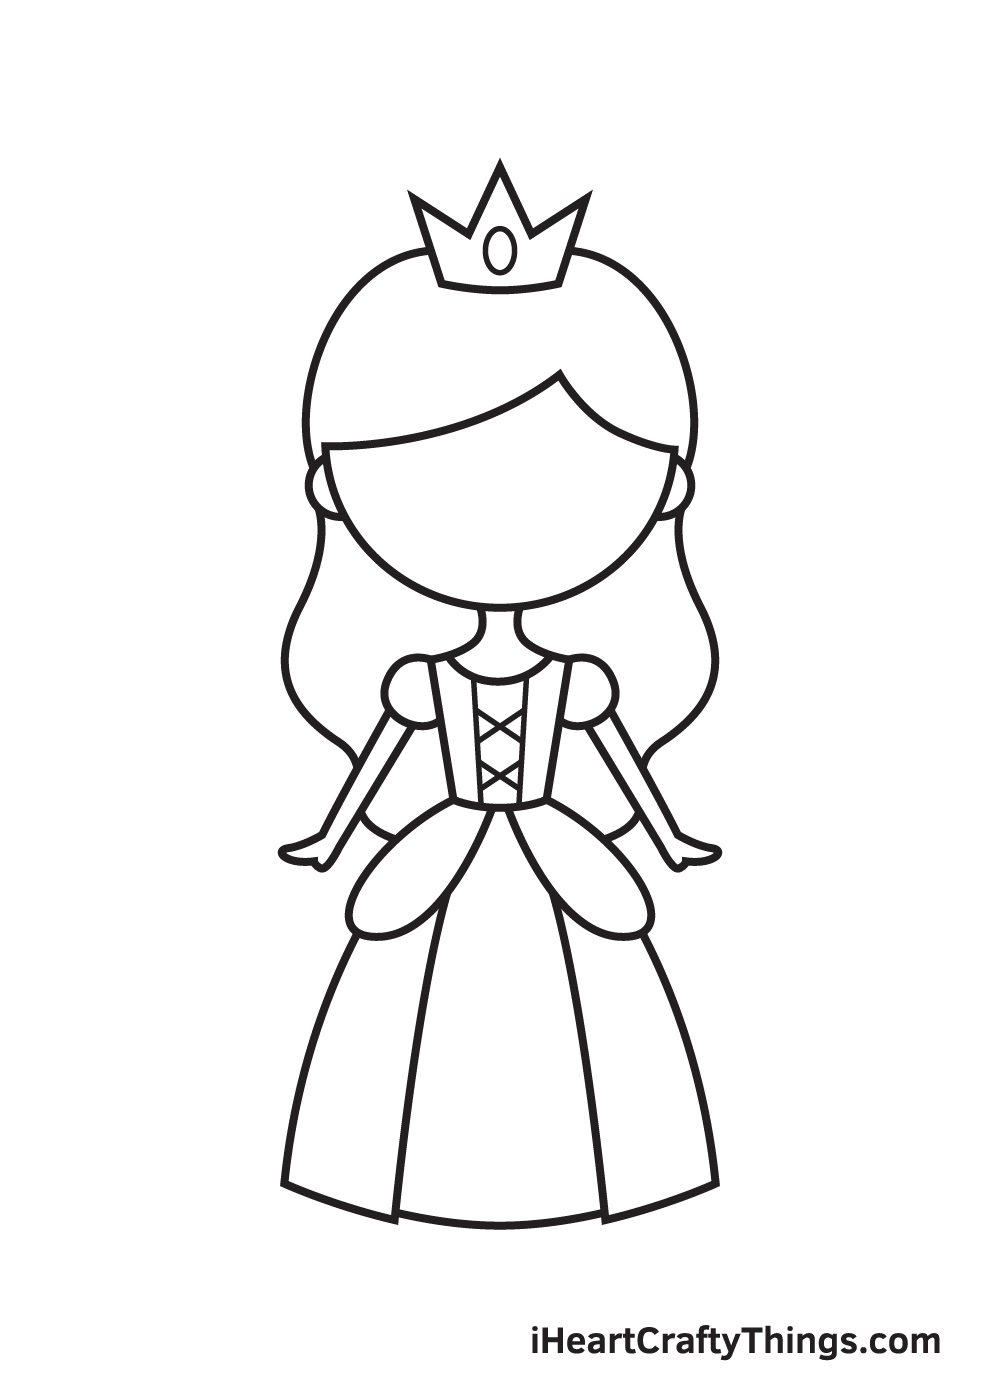
Now, it's time to get a little more artistic by adding patterns on the crown and the gown.
Draw a criss-cross strap on the middle of the bodice and a huge gem in the middle of the crown, as shown in the illustration.
You can opt to follow the illustration exactly how it is, or style the dress and the crown using your own design ideas.
Step 9 — Draw the Facial Features of the Princess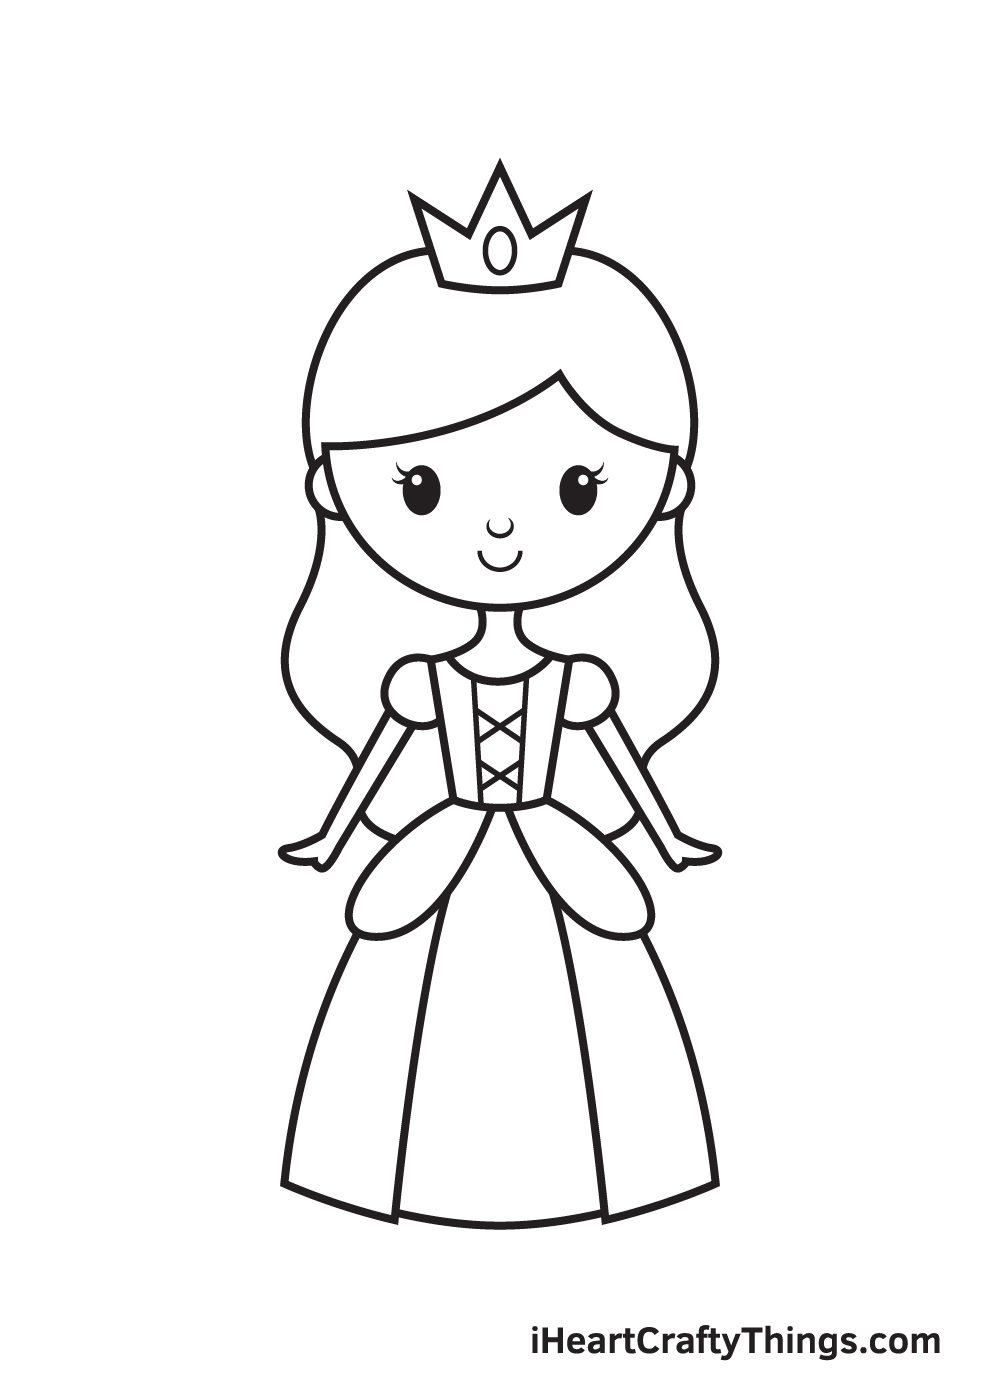
Make the princess look radiant and happy by adding the facial features. Draw two oval shapes below the forehead to outline the eyes.
Then, draw a tiny circle inside each eye to create the iris. Shade the entire eye aside from the iris for a dramatic "gleaming eyes" effect!
Now, in the bottom middle of the face, draw two upward curved lines to outline the nose and the lips of the princess.
Here, you can see the princess is nearly finished! The only thing it's missing is a dash of multiple colors to complete your artwork!
Finally, here is the most exciting part—filling in the colors for your awesome drawing! This is the part where you can show off your artistic skills and your ability to mix and match various colors.
The sky's the limit when coloring your princess drawing. You can color its crown, hair, and dress using any colors you like! You can even use your favorite color for the dress if you want to. It's all up to you!
Feel free to color your princess drawing however you like and watch as your drawing ultimately comes to life! And while you're at it, why not try experimenting with different coloring materials such as watercolor and brush pens as well?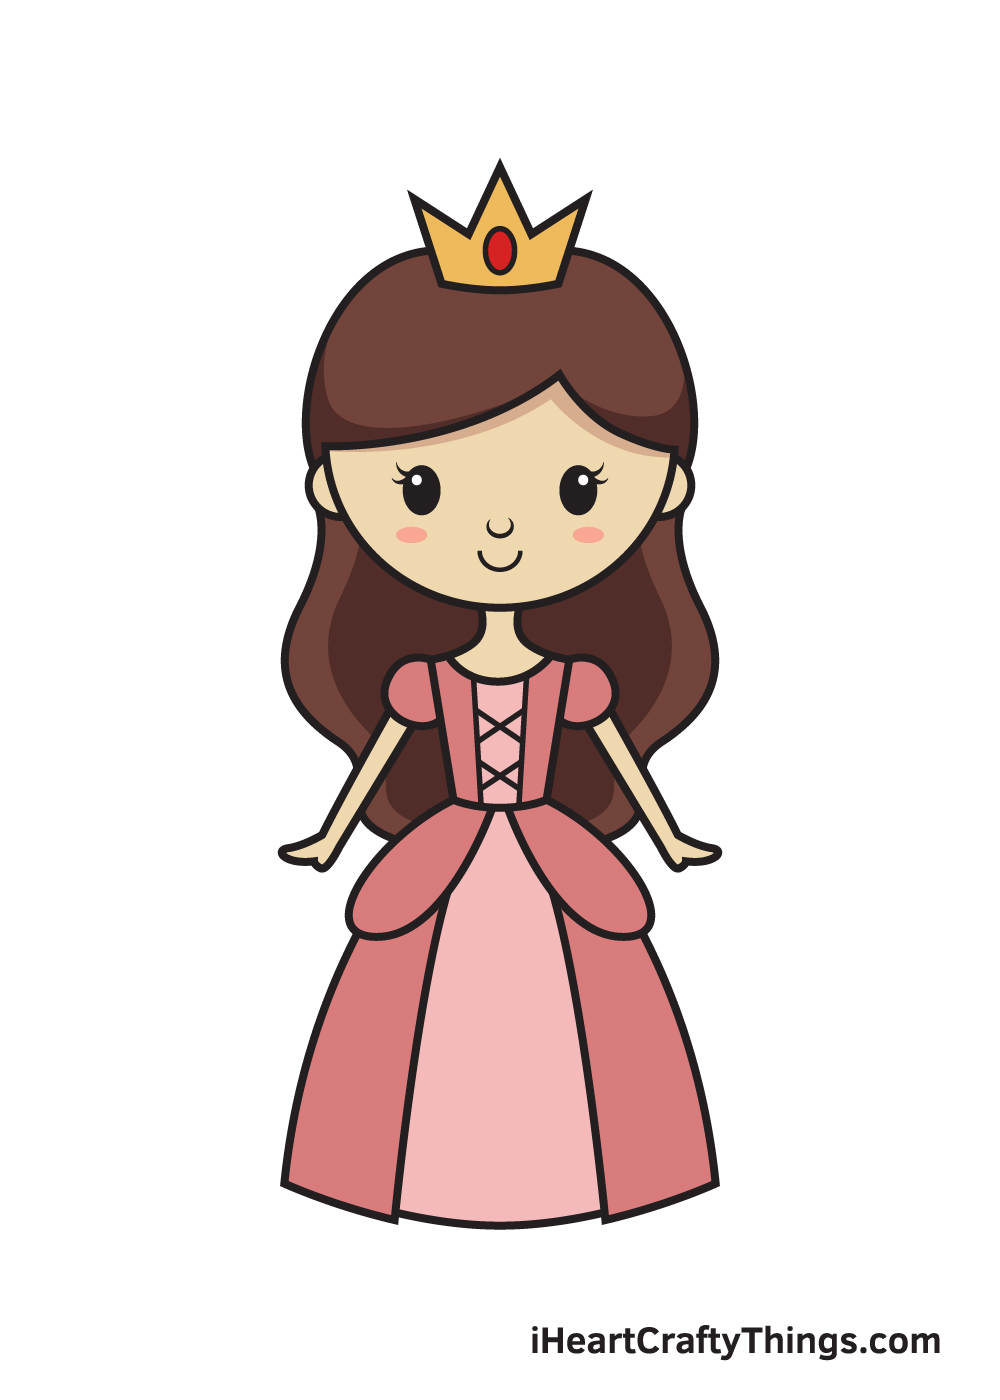
Your Princess Drawing is Complete!
We hope you enjoy this step-by-step tutorial on how to draw a princess. With this guide, you can surely draw and color a princess along with its complex features and elaborate details in no time.
And the most fun part is, you can customize its physical attributes and play with various colors as much as you like!
We are always updating our "How to Draw" catalog, so make sure to keep checking back on our website to take advantage of newly uploaded tutorials.
All you need is a pen and paper and you're all set to start drawing! We are excited to see what you will draw next. We're sure it will be just as amazing as this one!
Once you've finished your masterpiece, we're certain you must be feeling very proud of yourself—as you should be! Completing this princess drawing is definitely fulfilling.
Make sure to show off your work of art and share it on our Facebook page and on Pinterest. We're sure it looks amazing! We can't wait to see your colorful princess drawing!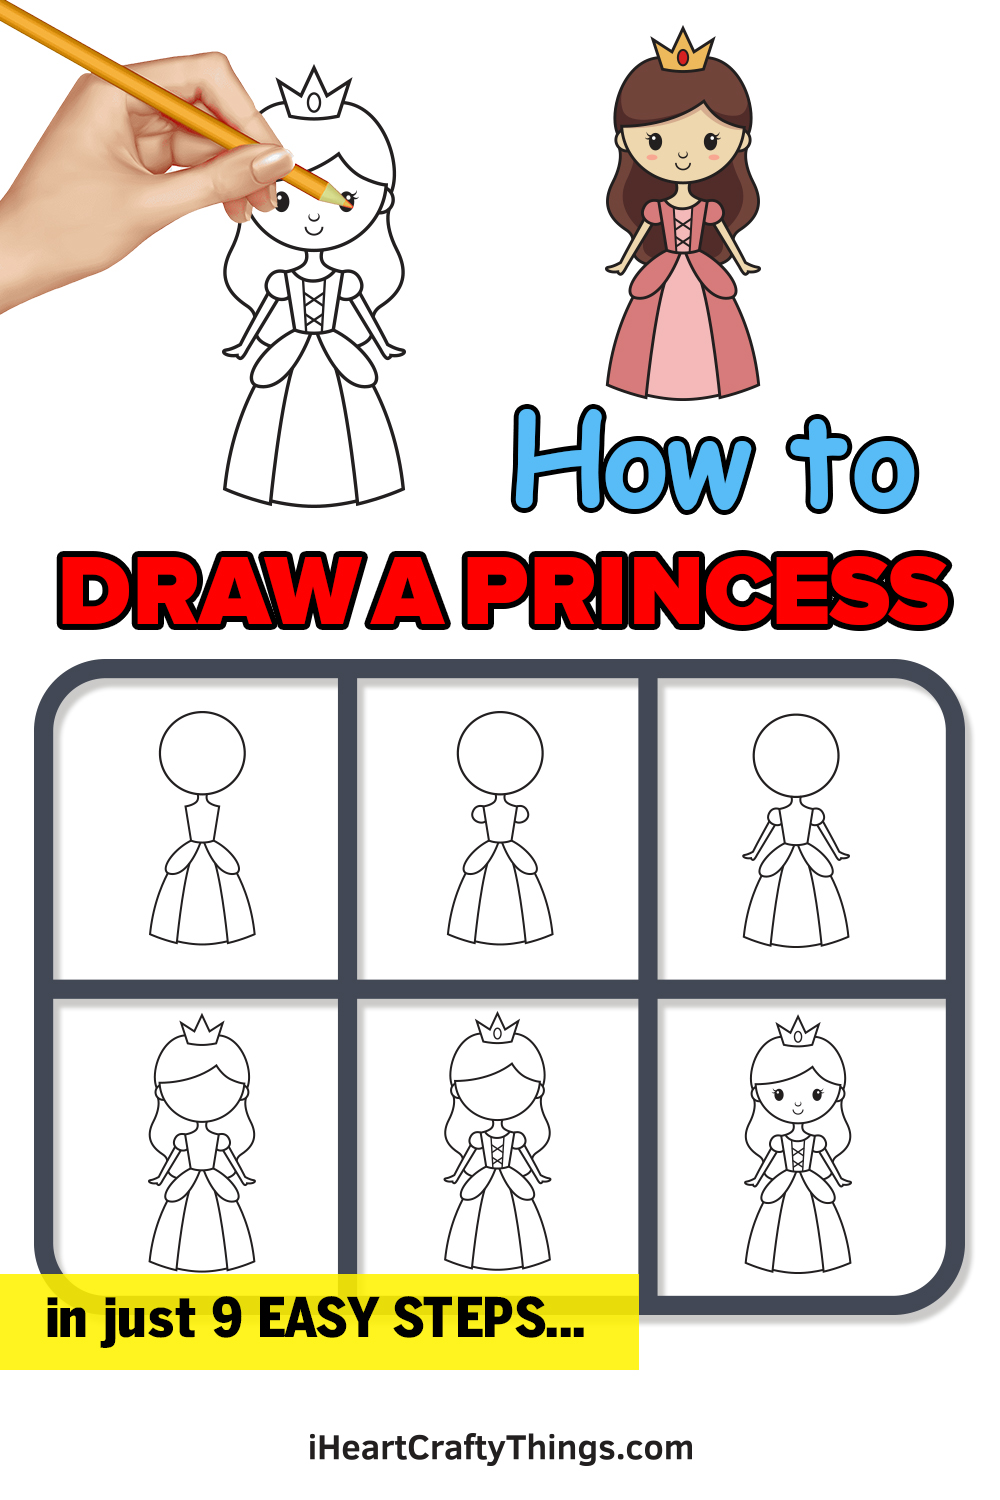
Drawings of Disney Princesses Step by Step
Source: https://iheartcraftythings.com/princess-drawing.html
0 Response to "Drawings of Disney Princesses Step by Step"
Post a Comment